Our equipement.
INDEX:
The tent/trailer:
The tent:
We've adapted to our needs a roof top tent ...
...that is normally intended to be installed on a car or truck roof
(Thus the name: roof top tent!)
Very versatile, is'nt it?


Autohome
Canada. Exclusive Canadian importer of high quality Autohome roof top tents.
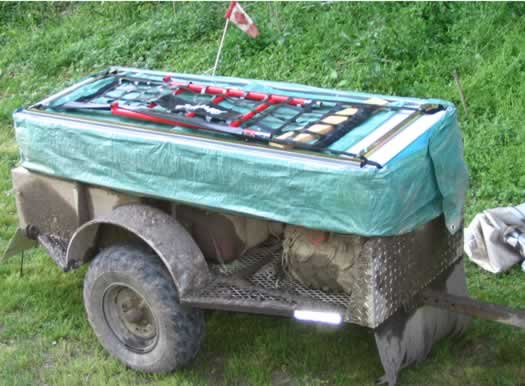
After a day of riding, this is what our equipement looks like.
Euhhh....You think we'll sleep in that, tonight???
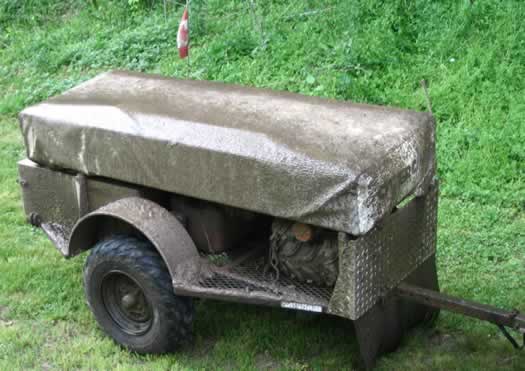
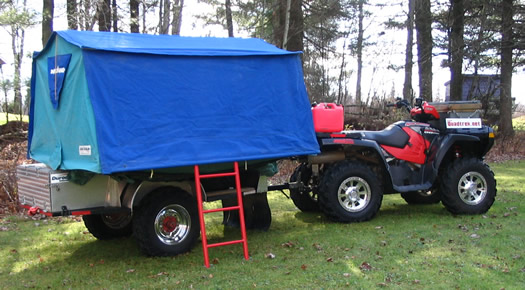
Ta Daaahh!!! The supplied cover keeps it clean and dry.
Pretty convincing, is'nt it?
The complete set-up takes less than 5 minutes.
First step.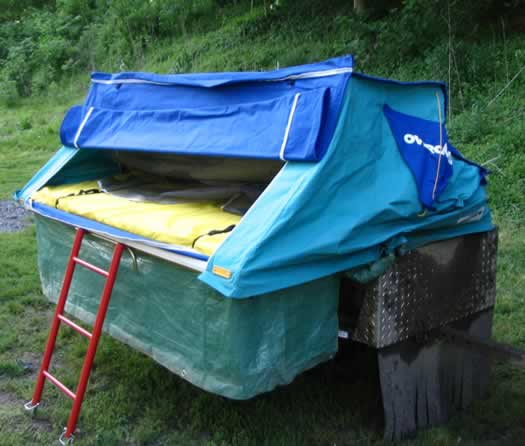
Voilŕ!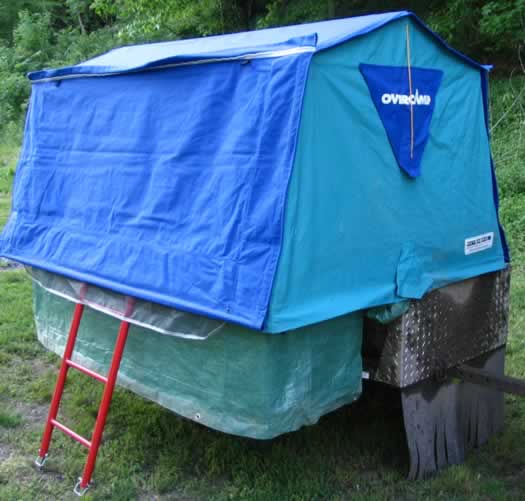
We use an old bunk beds ladder cut to the right lenght as a support. Note that the
bottom ends of the ladder are adjustable to accomodate uneven terrain.
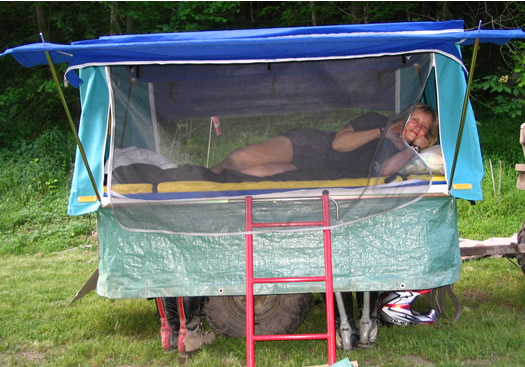
Both side doors become awnings in open position. The 2 huge mosquitoe nets allow
ventilation and visibility.
There was no need for modifications on the tent to install it on the trailer.
Only two brackets were custom made following a small design flaw...on the
trailer...We picked up this model because, at 26 in. wide and 80 in. long, it had ideal
measurements for our needs. At approx. 120 lbs she's no feather-weight though.
Modifications we made to the tent to adapt it to our specific
needs:
1o : Replaced foam mattress with our self-inflating mattresses.
Benefits :
Thinner and just as comfortable, once deflated, they leave more room for our personnal
effects (like sleeping bags, pillows, etc...) inside when the tent is folded down, and
they don't absorb humidity.
2o : Added a sheet of "Thermo-Foil"’.
Benefits :
More comfort. They create an air chamber between the mattresses and the floor of the tent.
They also reflect our body heat towards us and reflect the cold towards the outside. No
doubts they'll be appreciated in the Rockies...
3o : Added a flexible plastic sheet door each side.
Benefits: Lets us see outside
while still being out of the cold and rain. Could become useful to watch the bears, at
night...
4o : Installed a string system to be able to keep the doors 1/2
or 3/4 open from the inside.
Benefits: Used in conjuction
with the plastic doors or not, keeps a limited privacy while enabeling us to see outside.
5o : Installed small tarps around the tent to better protect it
during travelling. Being design to be installed on a car, we figured extra protection
against dust and mud would be needed. Moreover, one of these tarps is used as a skirt to
create a small dry space under the tent when it's open. (See pictures)
6o : Installed a net underneath the hanging portion of the tent when
it's open. It's actually sold to replace a pick-up truck tail-gate. (See picture above)
Benefit: Creates room where to
put our boots and personnal stuff away from the humidity of the ground and from our
crawling friends...
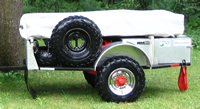
The
trailer :
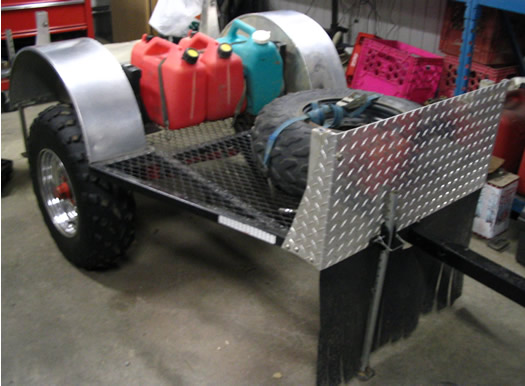
Its’ frame is
made of steel 1 1/4 X 1/8 in. square tubing. The floor is made of metallic mesh which
makes it easy to tie items down to it. The fenders, rock-guard, tent supports and the 7
cu. ft compartment (30’’ W. X 34’’ L. X 12’’ H. approx) are
all made of aluminium to reduce weight. The 3 legs are made of EMT tubing usually used to
protect electrical wiring (Although the one on the picture seems bent, it's actually
straight...). The legs are needed to stabilize the trailer and also to prevent the tent
from partially folding when we're in it (due to the suspension collapsing).
The compartment is
100% waterproof (Hopefully…). It is made of 1/16 in. aluminium sheet and thus, very
light.
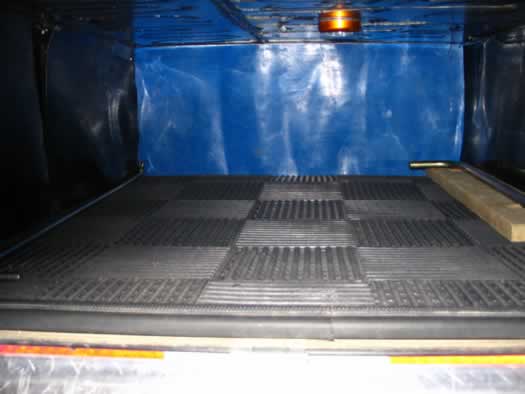
Drawbacks :
1o : Easy to
pierce through. I had to double the inside with plastic so items would’nt shake their
way through it.
2o : Tends to create condensation on the inside when exposed to
sudden temperature changes. Hard to ventilate without letting dust get in.
The tongue is telescopic. Make it longer and you get an even better
ride out of the suspension. Retract it to make it easier to load it on the bigger trailer
and to make it easier to get through tight spots.
The hand and ball (on the quad) are standard (1 7/8 in). From what
we've experienced on previous runs, I did'nt think it was necessary to use a swivel
tongue, judging that a regular hand would allow enough play. Note that the trailer is
fairly wide at 48in. overall and that its' center of gravity is low (most of the weight
either is in the compartment or on the floor with the jerry cans).It is very stable and
does'nt tend to tip over.
More benefits of a 48 in. width:
1o : The tires of
the trailer follow in the tracks of those of the quad.
2o : Many trails
limit vehicule width to 50 in.
The suspension is home made. Totally independent, with 18 in. of
ground clearance and 7 in. of travel. It's similar to a single A-arm suspension on which
you would rotate the wheel 90*. The A-arm is couple to a spring-shock duo (similar to a
MacPherson) using a Polaris Scrambler 500 front spring (dual rate) and a Polaris
Sporstsman 500 rear shock. The end result is a vertical movement respecting the natural
tendancy of the wheel to move backwards when it hits an obstacle on the trail. In short,
it gives a heck of a ride!
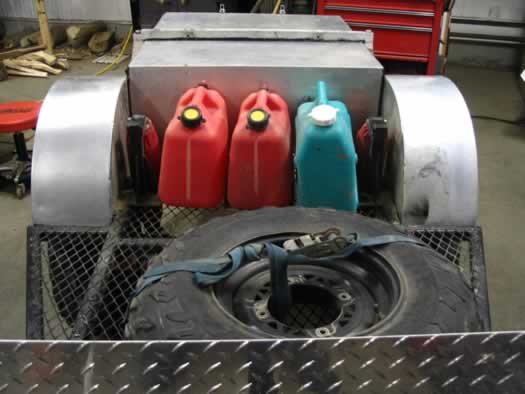
I installed standard domestic trailer wheel hubs using
"Dexter" bearings available most every where in North-America. The trailer tires
and the spares are Carlisle 489, 25 X 8 X 12 mounted on Polaris Sportsman 500 front
wheels. The major benefit here is that the spares can be installed either in the front or
the back of the quads as well as on the trailer.
The lighting system is composed of one marker light, one brake light and one blinker on
each side. Each light uses only one extra-bright LED. All wires are protected. They either
run through plastic tubing or into the frame itself. It's all connected to the quads'
lighting system through a spiraled extensible cord.
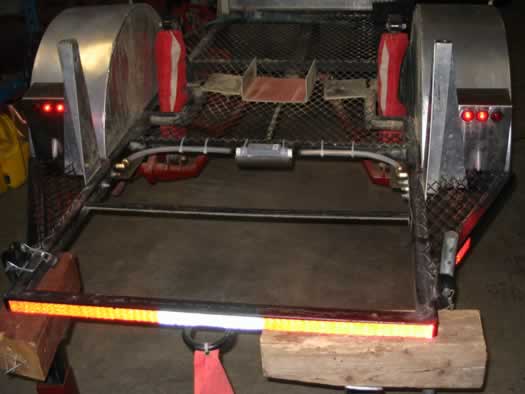
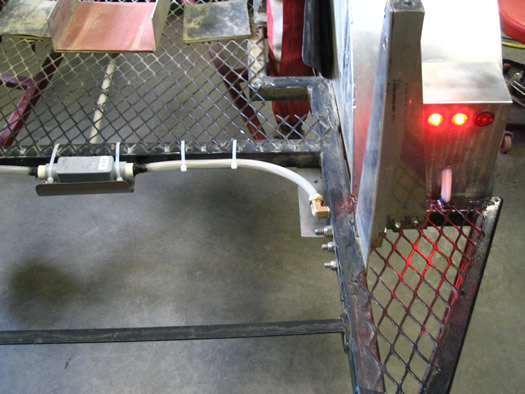
Note the stainless-steel skidplates protecting sensitive parts such as the junction box
and the brass fittings.
Besides the compartment and both spare tires, there's enough room on the trailers'
floor to carry up to six 3 gals. jerry cans of water or gas...But, got to keep an eye on
the weight...Speaking of weight, the trailer complete with compartment, spare tires and
wheels weighs around 280 lbs (without the tent).
What's great about our kit:
- We don't sleep on the ground so no
moisture or roots, rocks or whatever.
- The tent can be pitched no matter the
terrain, be it very wet or rocky.
- Very easy and quick to set up. Less time
spent setting up means more time spent enjoying the ride.
- More room to carry stuff.
What's not so great about it:
-
It's kind of tight. The tent is a
place to sleep in, not to live in...
-
Hauling a trailer when on the
trails is'nt necessarily obvious...
-
Costly.
-
Greater chances of breakdowns.
Quite a few mods have been made since the beginning of our test runs (when we used a
regular tent). Compare the first version with the latest...
Numbers:
| Tent |
Lenght |
Width closed |
Width open |
Height folded |
Height inside |
Weight |
Cost |
| |
80 in |
26 in |
52 in |
12 in |
38 in |
120.lbs |
Approx. 1200$.US |
| |
| Trailer |
Lenght |
Width |
|
Height (no tent) |
Floor height |
Weight |
Cost |
| |
112 in |
48 in |
|
34 in |
20 in |
280.lbs |
Approx. 1800$.US. |
| |
| Kit |
Lenght |
|
Width open |
|
Total height (open) |
Weight |
Cost |
| |
112 in |
|
66 in |
|
72 in |
400.lbs |
More than 3000$.US |
The quads:
Are'nt they nice...
These are our babies as they were born...(We're talking about the quads...)
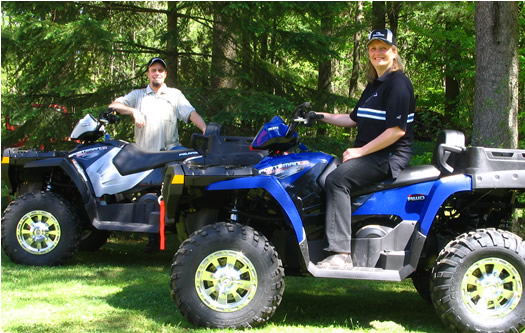
Thanks to Polaris ind., we have the opportunity to do this trip with 2 new Sportsman X2
800 EFI.
We chose X2s because they match our criterias and offer some unique features:
-Loading capacity: 400 lbs for the dump box and 90 lbs for the front storage. With all
the stuff we carry for 10 months, it became a major factor.
-Front rack/cargo compartment:Even if we stack large items on the rack, we still have
access to our stuff stored inside the storage compartment (away from water and dust),
every single space counts.
-Longer wheel base: Better handling (most important when heavily loaded and on steep
grades), more comfortable ride.
-Turf mode (rear differential): Easier driving on publics roads that we will have to
use in some areas. Turf mode goes easy on sensitive terrain and gives a tighter turning
radius. That also means less driver fatigue and less tires and mechanical wear and tear.
-Lock & Ride: Easy to switch gear from one ATV to the other.
-4X4: So we can go anywhere!
-Transforming passenger seat: If necessary, easily transforms from 1-Up to a 2-Up in
seconds.
-Active Descent Control: Works in unison with EBS and give a true 4-wheel engine
braking, optimizing control when moving down hills and steep declines.
-Electronic fuel injection: Gives a consistent performance at varying altitudes and air
temperature, a must in the rockies where altitude will reach over 10,000 feet.
-Front and rear fully independent suspension (...so it does'nt become a 10 month Bottom
Bashing Adventure...)
-2 identical quads: -Same spare parts.
-Same spare tires.
-Same trail handling for both of us.
-Both quads can haul the trailer.
-Automatics ( a France only criteria...)
Modifications made to the quads:
(Note that most of these mods where done either to make the ATVs street legal or to
accomodate the extra gear we bring. Machines themselves remain stock)
-We installed the following accessories:
-Turn signals with in-dash indicators:
- Added front blinker assembly.
- Added blinkers on the trailer.
- Modified quads' existing tailight to include blinker. (Thanks Éric!)
-Horn.
-Licence plate light.
-Left hand side rear view mirror.
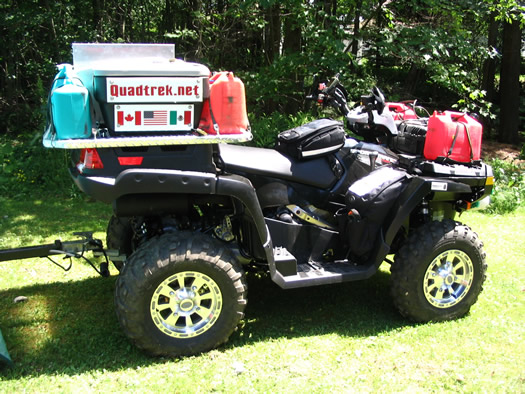
-We had an aluminium diamond plate custom built to fit the rear cargo box of our X2s
and installed to increase available surface to accomodate our gear. Another important
advantage of that add-on box cover is that the box it-self is still available and even
partially protected from the elements. The cover is attached to the box using Polaris
"Lock and Ride" system, so it can be pulled off in seconds to transfer it to the
other quad or to have easy access underneath if needed.
-With all this added gear it was becoming impossible to see behing the quad when
backing-up. So, we decided to add a rear-view camera !! (Thanks to Claude Champagne for
the idea !)
-For safety reasons, we also installed a security system that includes a "Panic
button" activating horn and headlights simultaneously. Hopefully, Mamabear will think
it's too noisy and go find something to eat elsewhere...
Note that a fellow ATVer who likes to run long trips similar to ours said there was not
a chance an un-modified quad could survive such a journey...(Guess he did'nt know you
should'nt tell me "You can't do that"...)...We'll see...
Most of our gear can be installed on either quad in a matter of minutes.
Here's why:
-One of the quads carries everything related to food (Kitchen, 12V cooler, food chest,
most heavy things...), while the other one pulls the trailer.
-In order not to over stress one quad, they will alternately pull the trailer. And
since we don't want to keep any food related items near the tent, we must be able to
switch gear from one ATV to the other.
-This way, we can leave the tent-trailer hooked on one quad and park the one that
carries the food so we can see it... from a safe distance...

Let us introduce you to our new riding partners. They will accompany us all along the
trip (hopefully...):
 |
Polar,
Proud to show our northern roots!
Always happy to wave HI ! |
Arnie,
Courage and endurance with a tender heart.
''Hasta la vista
Baby'' |
 |
Top of page
The equipment:
Coming soon!
|